Domains
Here you configure the Domains that you want to handle inbound mail for. Any inbound mail to recipients not in the domains listed here will be rejected by TUXGUARD Mail Gateway.
The domains are displayed in alphabetical order and show the next hop, disabled checkbox and the creation date, last update and the options to edit or delete the domain.
Add new domain
Enter the domain name in the input box provided.
The disabled checkbox allows the administrator to disable reception of mail for a domain temporarily.
This will defer all recipients to the domain, which means that any mail will be queued on the sending system, it is likely that the senders will get a warning that their message is queued after 4 hours and the mail will eventually be bounced back to them as undeliverable after 5 days (these are the RFC defaults).
Next Hop
Mail for this domain will be delivered to the specified host(s) specified here. You may add as many hops as desired by clicking the ‘Add another next-hop’ button. If the first next-hop server does not respond, then the subsequent next-hop is tried until the last is reached, at that point the message is queued and retried again later.
| Field | Description |
|---|---|
| Host/IP | IP address or Hostname of the destination server |
| Port | TCP port number to connect to the host, default: 25 (if left empty) |
| Weight | allows reordering the hosts as the lowest priority next-hop will be selected first (optional) |
| Username and Password | SMTP AUTH credentials to send to the host before message delivery |
| TLS | specify whether TLS to be used opportunistically, required or disabled |
See the Mail Server Configuration section for instructions on how these systems should be configured to work correctly with TUXGUARD Mail Gateway.
Recipient Verfication
TUXGUARD Mail Gateway will always attempt to verify each recipient as it is very important that messages are only accepted for email addresses that are valid on the backend mail server as it wastes computing resources and can cause Backscatter spam to be generated.
To do this is it performs a dummy SMTP transaction by connecting to the specified hosts and sends the recipient along with a dummy recipient to test whether the host is able to reject invalid recipients (or has a catch-all).
If a host is found to accept invalid recipients, a cache record is created and no further recipient verification is performed until this cache record expires after 24 hours at which point the host will be retested and a new cache entry created if it is still not capable.
As recipient verification is a common task, a connection pool is used so that multiple recipients can be verified down the same connection without the need to reconnect each time.
By default the pool connection is kept open for 5 minutes and a maximum of 10 pooled connections are allowed at any time.
Once a recipient is verified the result is cached for 1 hour and invalid recipients are cached for 5 minutes but the cache entry is only used if there is no pooled connection available.
This is done to provide the most accurate answer possible and to maintain the connection pool.
By default the recipients are checked with the Next Hop servers.
Using the ‘Lookup Method’ drop-down, you can select ‘SMTP’ and configure a different SMTP server(s) to be used for recipient verification.
You can specify multiple hosts by delimiting them with a comma, space or semicolon.
Domain Configuration
After creating a domain, it is possible to define domain specific configuration settings by clicking on the cog icon next to a domain list entry:

The domain configuration view contains a number of options that can be set specifically for the domain, for example additional filename rules for attachements:

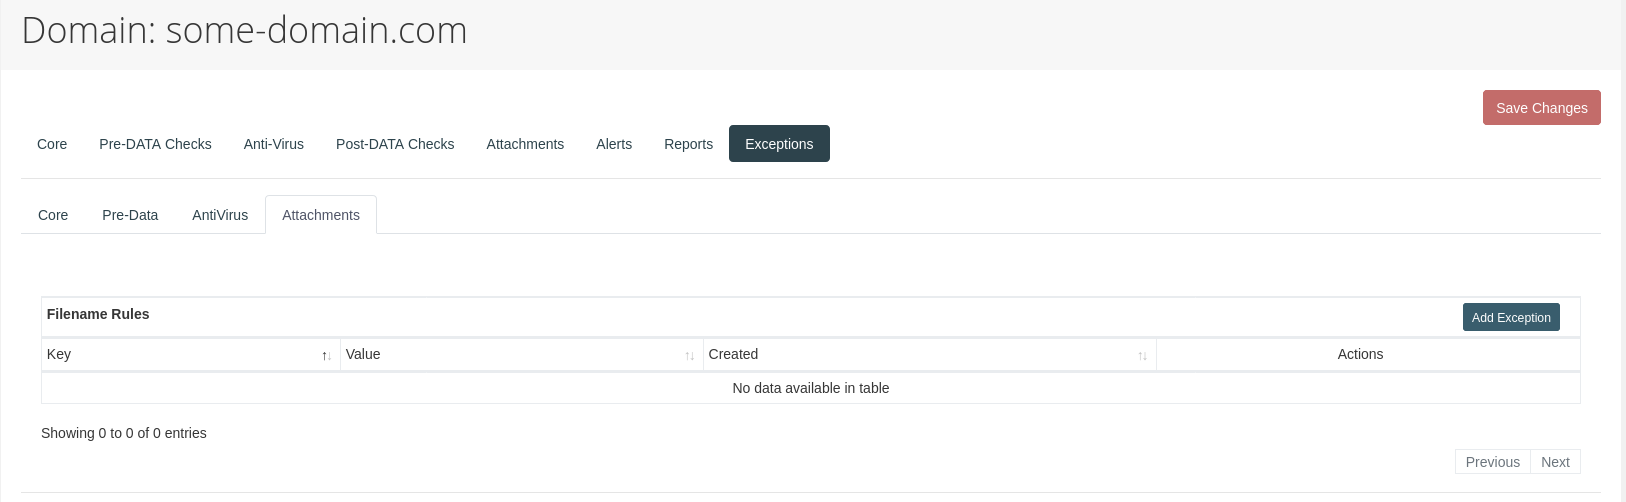
It is furthermore possible to set exception rules for a domain by using the "Add Exception" button in the "Exceptions" section of the config view:
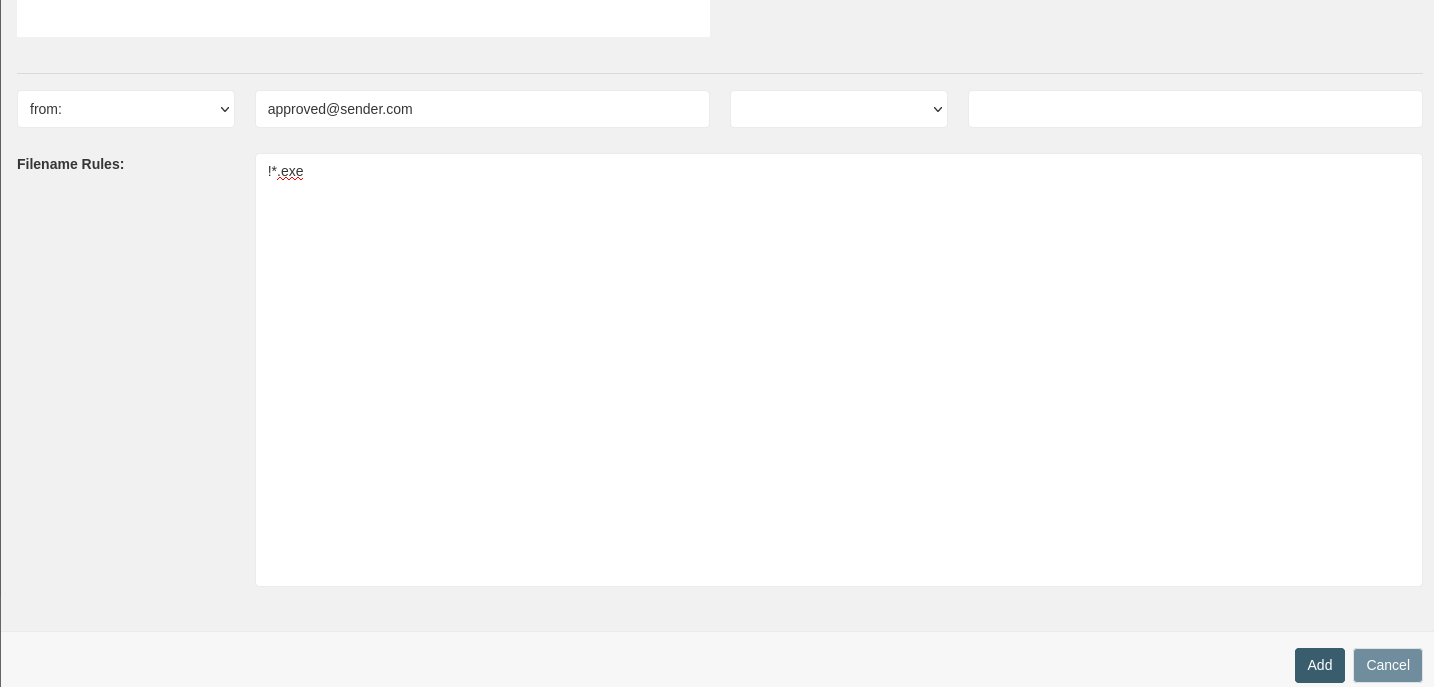
It will open a modal where one can specify a rule to be applied (here, we are allowing "approved@sender.com" to send us ".exe" files):
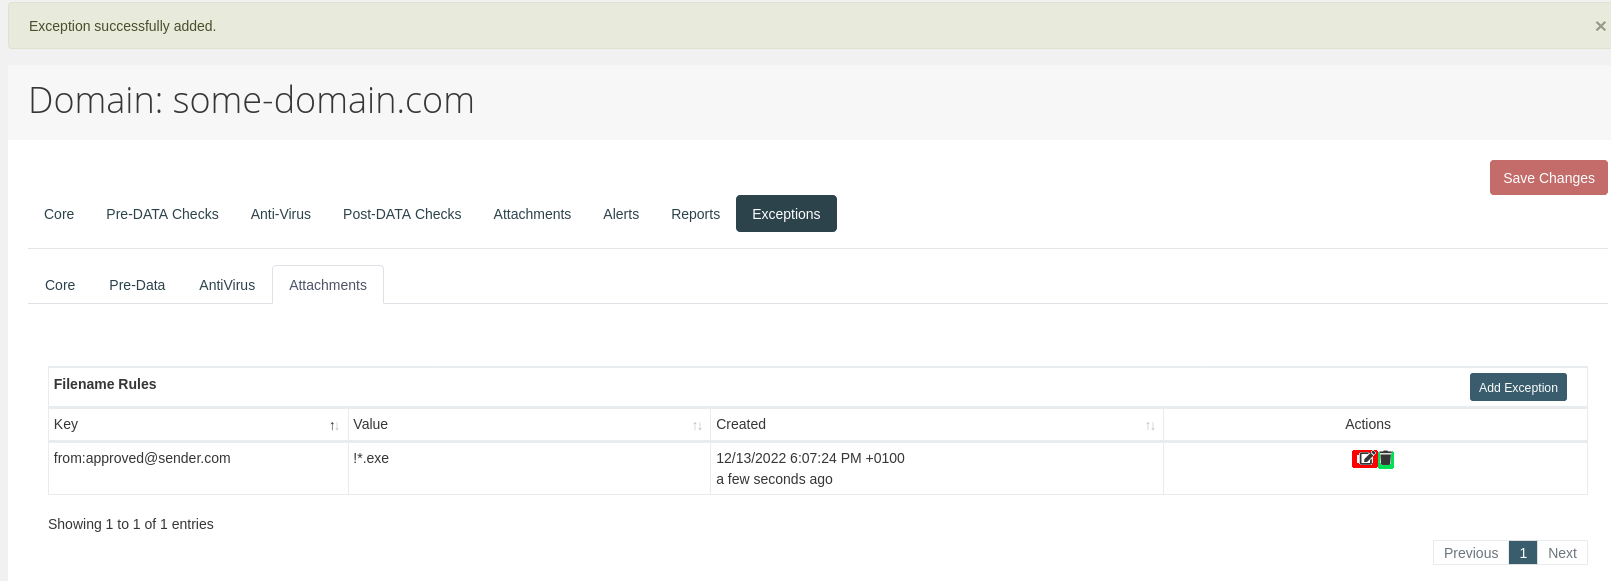
The resulting exception can be edited (red) and deleted (blue) in the list view:
Note
When adding a filename or archive filename attachement rule, make sure to place every filename rule on a separate line. For exceptions, the values should be prefixed by an exclamation mark "!" (although, this will get auto-corrected during saving of the rule)